


Introduction
In a previous post, I explained how to get started with AWS Amplify and add hosting to a project. In this post, I'm going to show how Amplify provides tools to allow us to easily add user authentication into a React application.
Configuring Security
Adding authentication to a project starts with the Amplify cli.
amplify add auth
As with hosting, the Amplify cli takes us through the different choices providing good default values at each stage. The first question asks what we want to use as the default authentication configuration.
Do you want to use the default authentication and security configuration? (Use arrow
 keys)
❯ Default configuration
  Default configuration with Social Provider (Federation)
  Manual configuration
  I want to learn more.
This question is asking how we want to set up Amazon Cognito, effectively how do we want users to be managed. Do we want to authenticate users in AWS, or do we want to use an external provider such as Facebook or Twitter ? Selecting the default configuration allows us to manage everything in Amazon Cognito and causes both User Pools and Identity Pools to be created. You can think of a User Pool as a directory of users and authentication for those users. An identity pool is used to provide temporary access, so for example for unauthenticated users.
In this example, I've selected Default configuration.
Next, we're asked how we want users to be able to log in. Is it by email, username, phone number etc.
How do you want users to be able to sign in?
  Username
❯ Email
  Phone Number
  Email or Phone Number
  I want to learn more.
In this example, I've selected Email.
Next, we're asked if we want to configure advanced settings.
Do you want to configure advanced settings? (Use arrow keys)
❯ No, I am done.
  Yes, I want to make some additional changes.
Selecting Yes here displays further questions allowing the security to be finely tuned, for example, do we want to use CAPTCHA, do we want to add the user into groups etc.
For this example, I've opted to go with the default settings as these provide a great example of how to configure security.
Now that everything has been defined, we can push the configuration up to AWS using the amplify push command
$ amplify push
✔ Successfully pulled backend environment dev from the cloud.

Current Environment: dev

| Category | Resource name         | Operation | Provider plugin   |
| -------- | --------------------- | --------- | ----------------- |
| Auth     | nextbestthingaa6aaffb | Create    | awscloudformation |
| Hosting  | S3AndCloudFront       | No Change | awscloudformation |
? Are you sure you want to continue? Yes
⠼ Updating resources in the cloud. This may take a few minutes...
...
✔ All resources are updated in the cloud
You can see in this output, that Amplify has established that there are no changes to the hosting for the application, but that Authorization is to be created. Amplify has then used CloudFormation to provision everything needed for us.
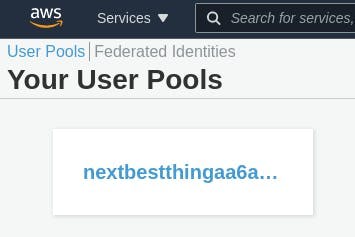
If you browse to Cognito in the AWS Console, you will now see that a User Pool has been created for the application.
Configuring React
Now that we've decided what authentication we want to use in our application, we can add security to React pages within a few lines of code. The first step is to configure our application so it knows how to communicate with the back-end.
Firstly, we need to ensure that the Amplify libraries are added into our project.
yarn install aws-amplify
Next, we need to import the Amplify library and the ./aws-exports.js file from the root of the project. The Amplify CLI has created this file for us, and it contains all the details necessary to connect to the backend. In React, a good place to put this code is within the index.js file just before the call to ReactDOM.render()
import Amplify from "aws-amplify";
import awsconfig from "./aws-exports";

Amplify.configure(awsconfig);
To save us some time, AWS provides a React library of user interface components that give us login / log out / signup etc. functionality. To use these, we need to add them to our project.
yarn add @aws-amplify/ui-react
We can now use these components to secure a page. We need to include the withAuthenticator component and wrap it around a component's export. We only need to do this on components that we want secured. If a component is available to everyone, this is not necessary.
import { withAuthenticator } from '@aws-amplify/ui-react'

function App() {
  return (
    ...
  );
}

export default withAuthenticator(App);
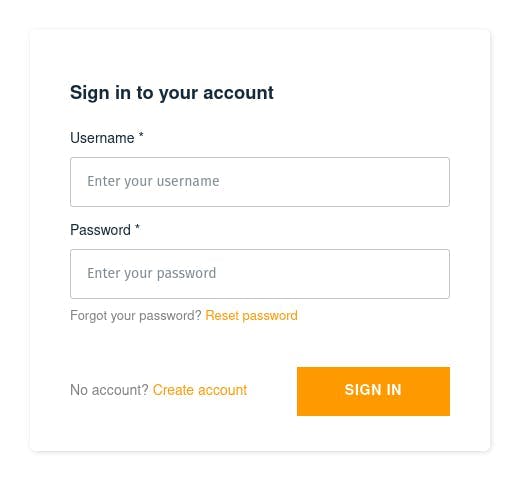
With the configuration above, whenever a user attempts to display the App component, they will be asked to sign in first.
Running The Application
Hopefully, you'll agree that we've had to write very little code to add authentication to our application. We've imported the standard React user interface components which will be used for signup and login etc. We can start a local instance of our application with yarn start and notice that we need to login to see the application.
If we don't have an account, we can signup:

Summary
In this article, I've shown the minimum required to add authentication to a React project using AWS Amplify. This is just a small taster of the features Amplify provides us - we can do so much more, for example, customize the login / signup pages, use Facebook as the authentication provider, add CAPTCHA to login pages, and much more. I'll describe these in future posts.
Thank you for getting this far :) If you've got any questions, drop a comment below.
Credits
Photo by Jose Fontano on Unsplash